
Photogrammetry re-topologizing
- emersonharrop
- Nov 2, 2021
- 4 min read
Updated: Nov 29, 2021
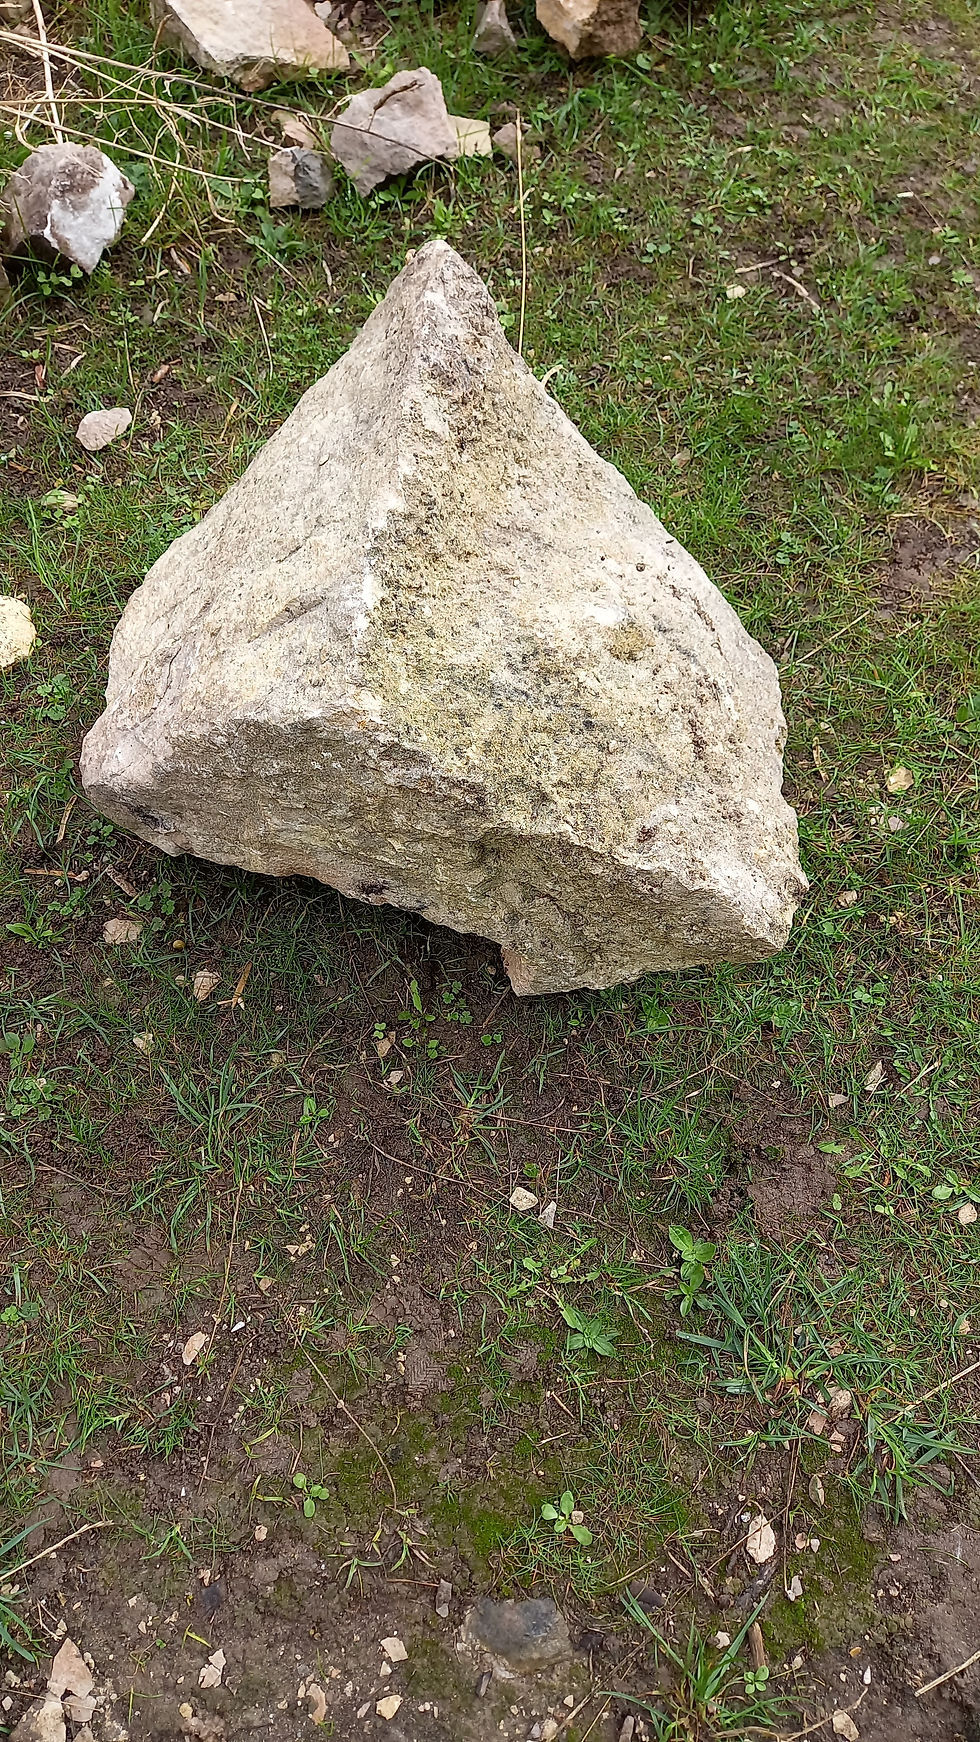
This image below is of one of the photos I used to capture data of this rock. For the photographs, I used a DSLR camera not nessacerily for the photo quality as I didn't really notice much of a difference between the quality of he captured data but because the cameras felt more comfortable to take the photos with than it does with my phone. This asset and other rock assets that I will do will be used in the establishing shot which will show the town in the middle of the desert with canyon rock formations.
To capture the data, put the photos in the preferred software (I used Autodesk recap) as from my research, I feel it is the better software and captures more details the Meshroom.

Save the asset then import it into the prefer re-topologizing software.
To for the re-topologizing, I decided to use Maya's quad draw tool. To use this start off, I simply imported the model into Maya (or Zbrush if that is my preferred software). From there, I selected the model and clicked on the magnet at the top of the (as seen on the image below) and made sure that the live surface had selected the original asset. From there, I used the quad draw tool in the modelling toolkit menu (or the mesh tools drop down). To use this tool, click 4 points on the mesh the hold shift at click in the middle of those points to connect them and then hold down tab and click and drag the edges to extrude the edges. As the edges extrude, they should automatically stick to the surface of the original model. To add extra edges for more detail, hold down the control button and a line should appear which follows the mouse then simply left click where to place it. As the lines are added, it will automatically add detail as it will follow the outline of the original model.


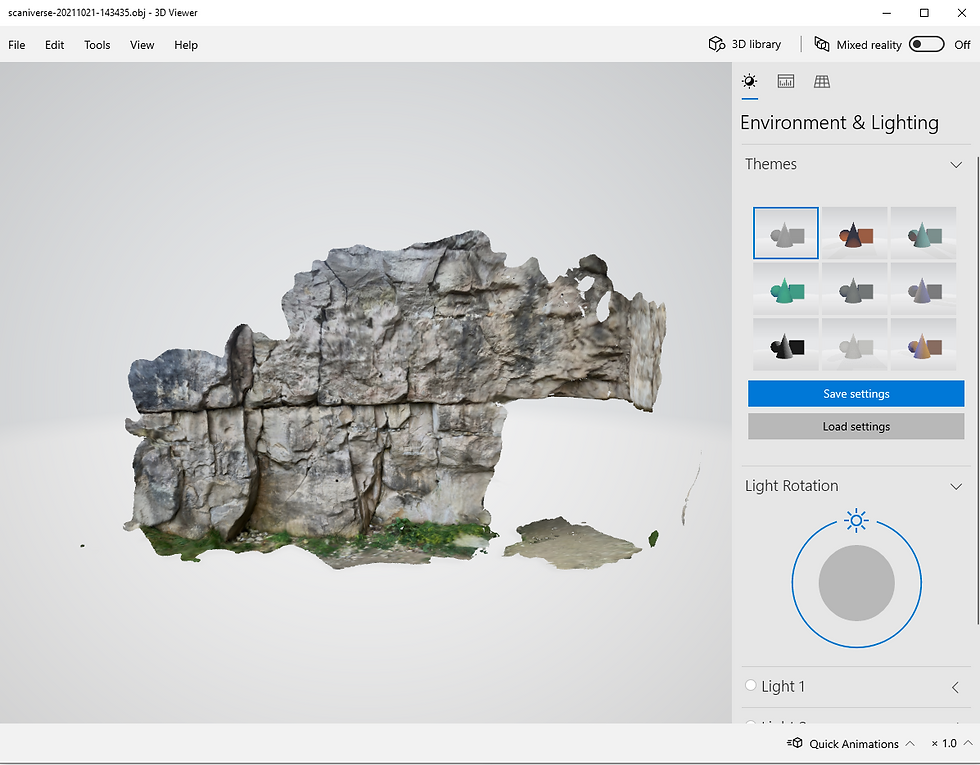
Then these images below are the results of the two rocks that I have topologized next to the original captured data (the white are the originals and the grey are the topologized ones).


Once the retopology had been completed, I unwrapped so that the textures can be applied to it later. To do this simply I opened UV editor and created a camera based. This then created a UV based on which side of the model the camera in the viewport is positioned. Then used the 3D cut and sew tool to cut the seams. I found this method much better to use than cutting the seems on the 2D UV as creating the seams on a 3D model made it easier to see what I was doing and where exactly being placed. To make the texture, take a snapshot of the UV as a JPEG so it can then be taken into Photoshop so the texture can be created over the UV.

Before making the texture I took the Model into Zbrush to do some sculpting on the model just to refine it a bit. To start with I added a couple of sub divisions to the base model then projected the original model's details onto it. I then took the base and started using the sculpting tools to flatten and mould some areas of the mesh. I also used some of the alpha brushes to add a little roughness to the rock.


To create the texture, I took the UV snapshot I created earlier and opened it in Photoshop. From there I opened the texture map and lined it up with the UV. This texture map didn't come out well, so I had to do some clone stamping to fill the gaps in. However this has made the texture look a but repetitive and smudgy. I then applied the texture in Unreal and despite the quality of the texture itself I think it came out pretty decently in terms of lining up and wrapping around the model. However as said the texture quality itself can be much better which means that I probably should have taken more photos of the subject maybe with some closer up angles to capture all the details. Because of how the texture came out, I wont be using this for the final piece, I will make my own texture using mega scans and mixer. This will also allow me the chance to create a sandstone texture that will fit within my final project with the desert setting which will be much more convincing that using the stone texture of the actual model and just colour correcting it.


The texture I am using on my asset is this texture as seen in the images below. Starting off was simply setting up the file by setting how big the plane is and the resolution size of the image. Then I added the first texture and colour corrected to give it the tint I wanted. I then added a second layer to increase the randomness and variety on the texture. The third texture I added was purely to give the texture some bump under the two main textures. Then I added noise to give it some random patterns across the whole texture. After adding the noise, I created a new texture for the top of the rock and then painted it onto the rock as seen in the last image below.
The reason my I chose to use mixer is because it is a very simply method to create some very realistic looking textures which would look way more realistic that simply colour correcting the textures that came with the data capture. Plus that one didn't come out well at all so re doing the texture is a much better option to get a realistic looking object.


Comments